|
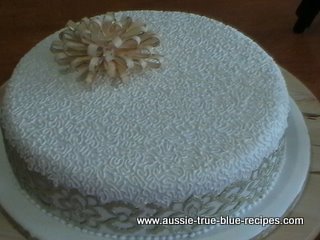
Fondant Gift Bow
This spectacular Fondant Gift Bow will make any Cake look like a piece of art. It looks complicated - but it's really quite simple. To start with, for this project you can use either modelling paste (sugar paste) or fondant. I chose to use fondant, with just a pinch of Tylopur (Tylose) kneaded through it to assist the drying process. Roll the paste out as thinly as possible - this bow is all about elegance. Using a sharp knife, or even a pizza cutter, cut out 20-30 strips that measure roughly 13cm in length, and about 6mm in width. Also cut out about 10 strips that measure roughly 7cm in length, and about 6mm in width. Lay the strips out before you, and form a loop - attaching the ends together with Flower Glue. I then thread a large knitting needle through the loops and suspend the knitting needle between two stacks of books or DVDs until the loops are dry enough that they maintain their form. I then lay the loops on foam in a dry place for a day or two, or until they are completely dry. Once dry enough to handle, I apply a petal dust to the bow to achieve the colour that I want. This is done at this stage, because it is easier to colour the bow loops individually before they are assembled, and before they are placed onto a cake. You don't want to risk breaking the Gift Bow, or accidentally spilling petal dust onto the surface of your cake. Using Royal Icing, commence adhering the loops onto a fondant disk, so that there are roughly 8 loops with their ends all meeting in the middle of the disk. Apply enough royal icing to ensure that the loops will be stable. Once the royal icing is set, perform the same action, but this time place the loops inbetween two loops from the row underneath. Use other loops to "prop up" these loops so that they can dry without sagging. Continue in this fashion until the Gift Bow is complete. It may be necessary to shorten the individual loops, so just simply snap off a small piece where the two ends of the loop meet to achieve the desired shape for the Gift Bow. The below video demonstration will show you step-by-step how to create this delightful cake decoration - I know you will find it easy to follow: Fondant Gift Bow - Video Demonstration
|

